
Easter Bunny Box DIY
I thought about this idea last year and surprisingly I have searched a lot but never found a bunny/Easter themed square box like this so I decide to make it myself and if I was successful I would share it with you. Everything from the box was made from scratch even the drawings were handmade by me, inspired by some cute bunny drawings that you can find online. So please use the printable as much as you want but don’t sell it or alter it in any way without my permission. After this being said have fun!
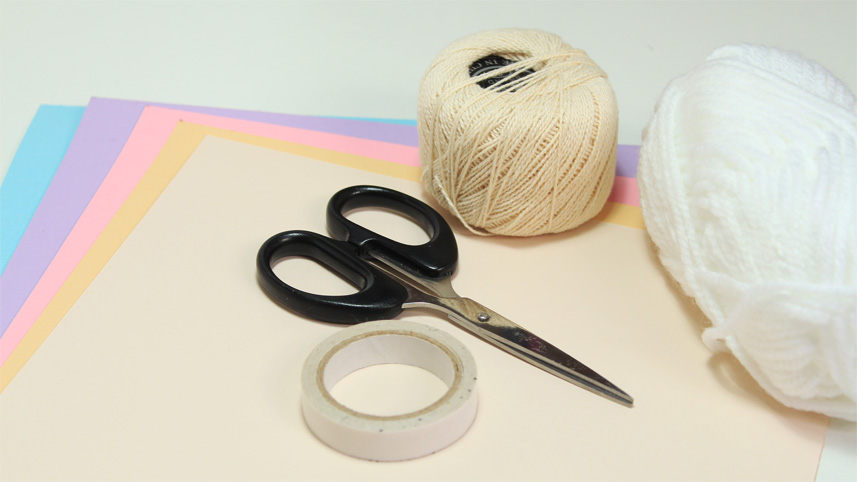
Supplies:
Card Stock (270 g/m2)
Yarn
Thin String
Scissors
Double Sided Tape
Clear Tape
Needle
Ruler (optional)
Tissue Paper
Easter Eggs
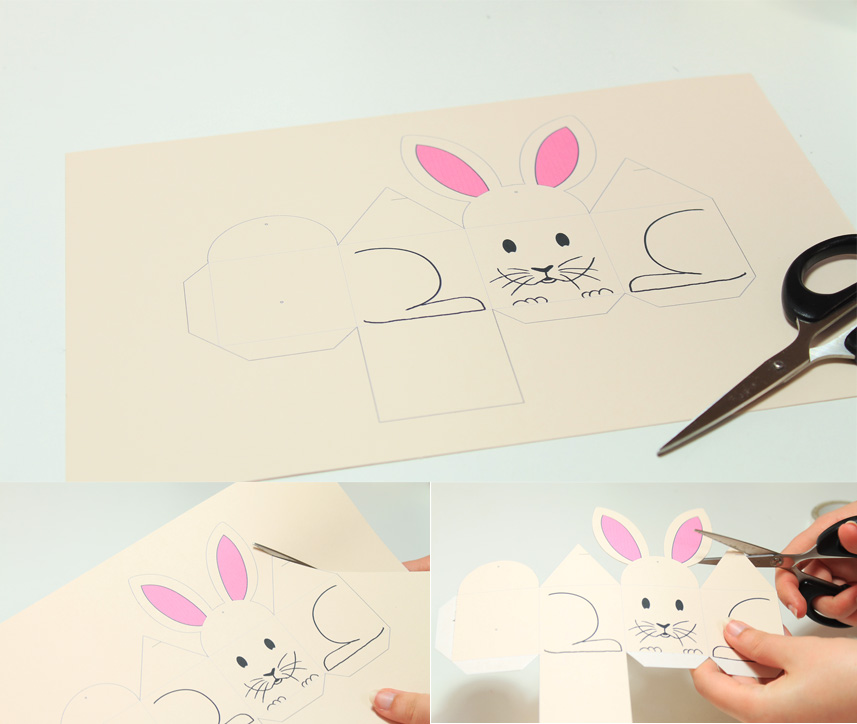
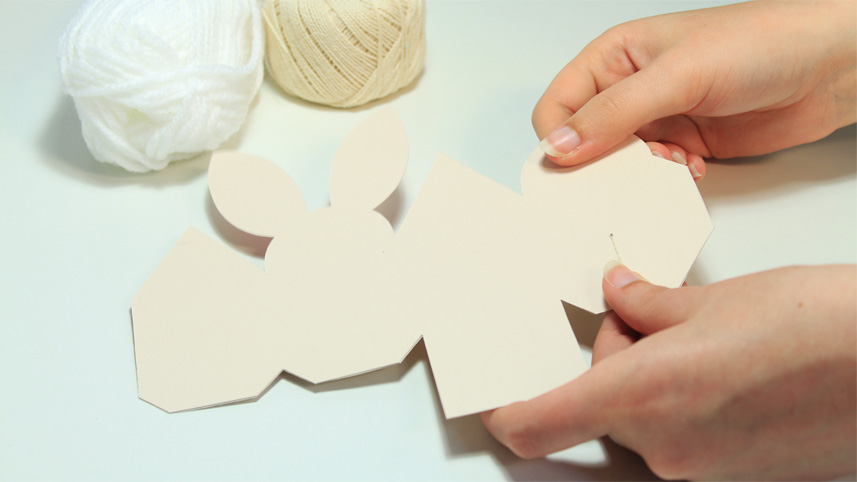
To start this craft you obviously need a template: Easter Bunny Box PDF
After downloading it, prepare the card stock. Mine was larger then my printer allows so I had to trim it down. I choose pastel colours because I like and they look cute together. When your base material is ready just print as many as you want and cut along side the black line – and ONLY THE BLACK LINE!
Also, don’t forget to do this small cuts so you can close the box later.
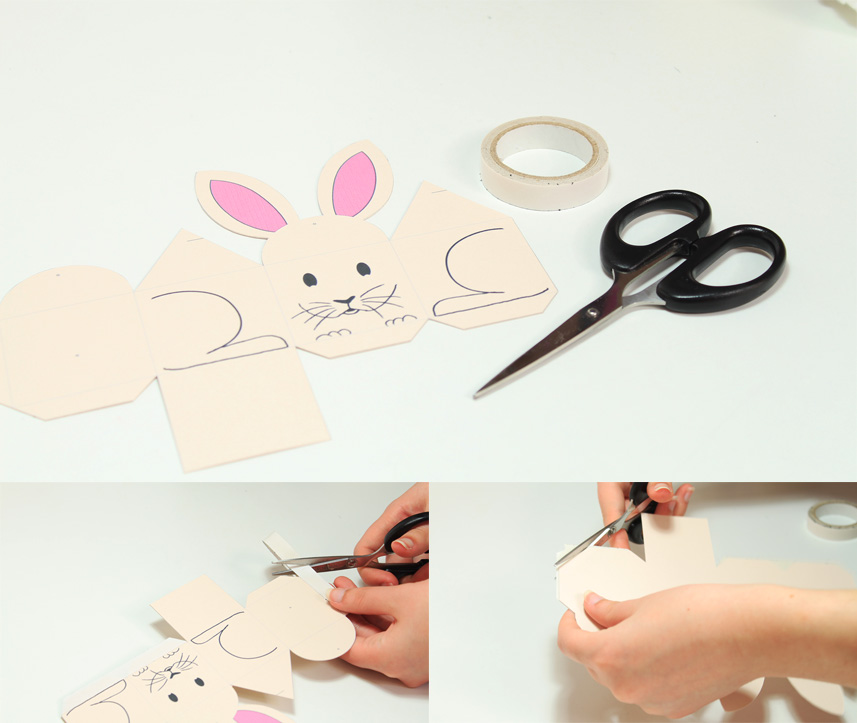
This next step is only valid if you use double glued duck tape.
Since I’ve discovered this amazing invention I’m loving glueing everything. And for this box, you will need to cut bits of tape larger than the actual tab. When you are done covering every single one just trim it.
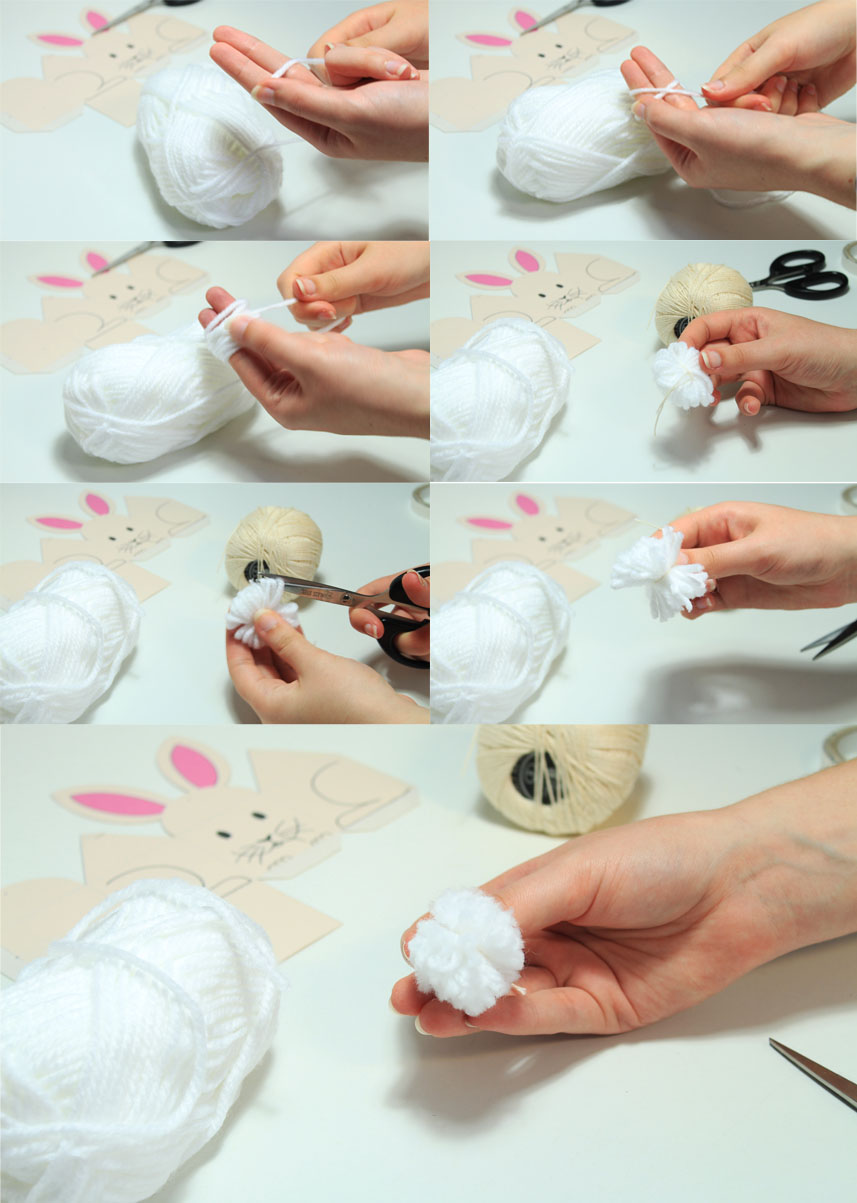
Pom Pom time!! Bunnies are cute but their tales are cuter. I’m going to leave here a link to different methods to create pom poms. Also, you can search on Pinterest for more pom pom inspiration it is huge world – but I’ll leave it for another time.
Just grab your yarn ball and start by making a cross around two fingers and going around them for about 30 times. Actually, there is no need to make them too big or it will overcome the size of the box. Once you have enough yarn, pass between your fingers a thinner string finishing with a double note to secure the yarn together. Then grab your scissors and start to cut the loops. Now you just need to trim into a round shape.
Next, you need to place the pom pom on the back side of the box. Pass through the hole a small string attached to the tail and place a bit of duck tape to secure in place. Remember to keep it as thigh as possible.
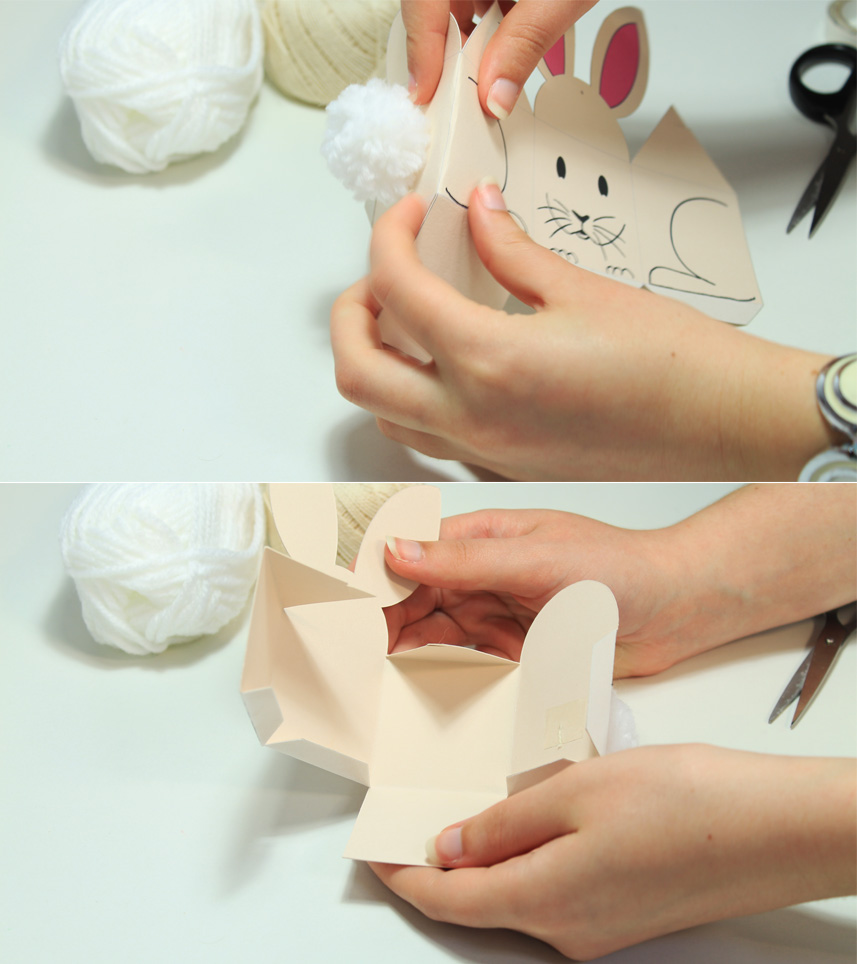
Do you see the grey lines? Fold the box with them facing outside and you can do by hand or with the help of a ruler to create cleaner folds.
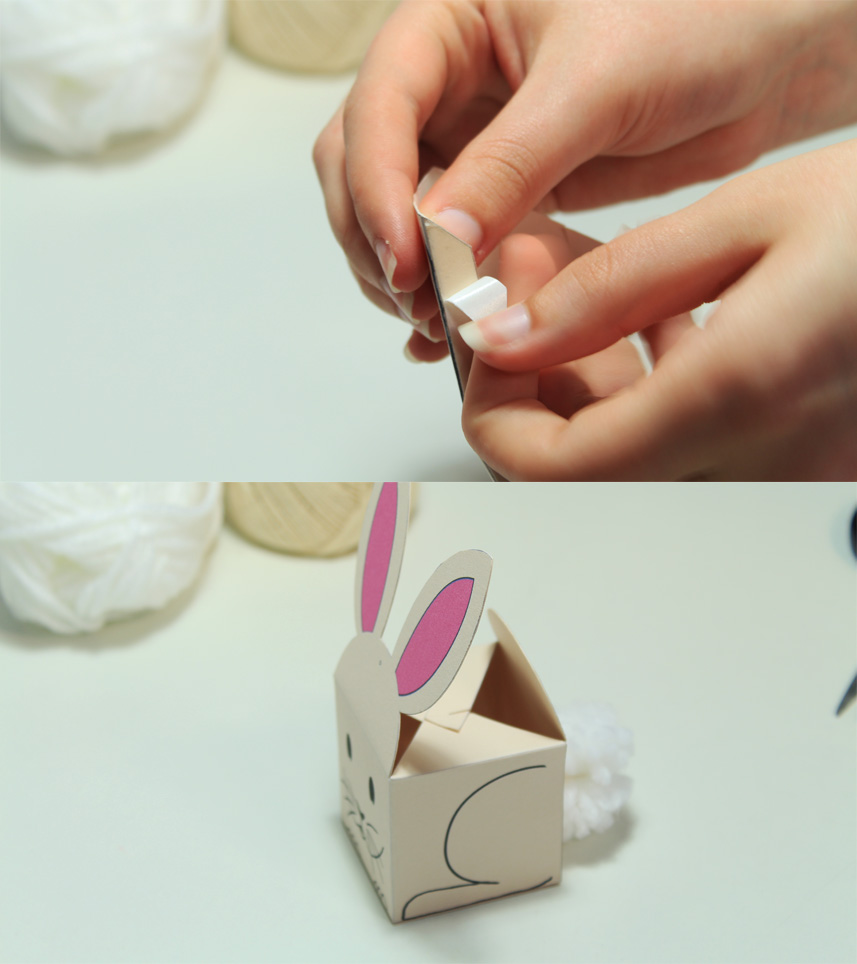
Time to peel off the non-sticky side of the duck tape or if you are using another kind of glue to use it and to assemble the entire box. Take a moment to appreciate how cute it’s becoming.
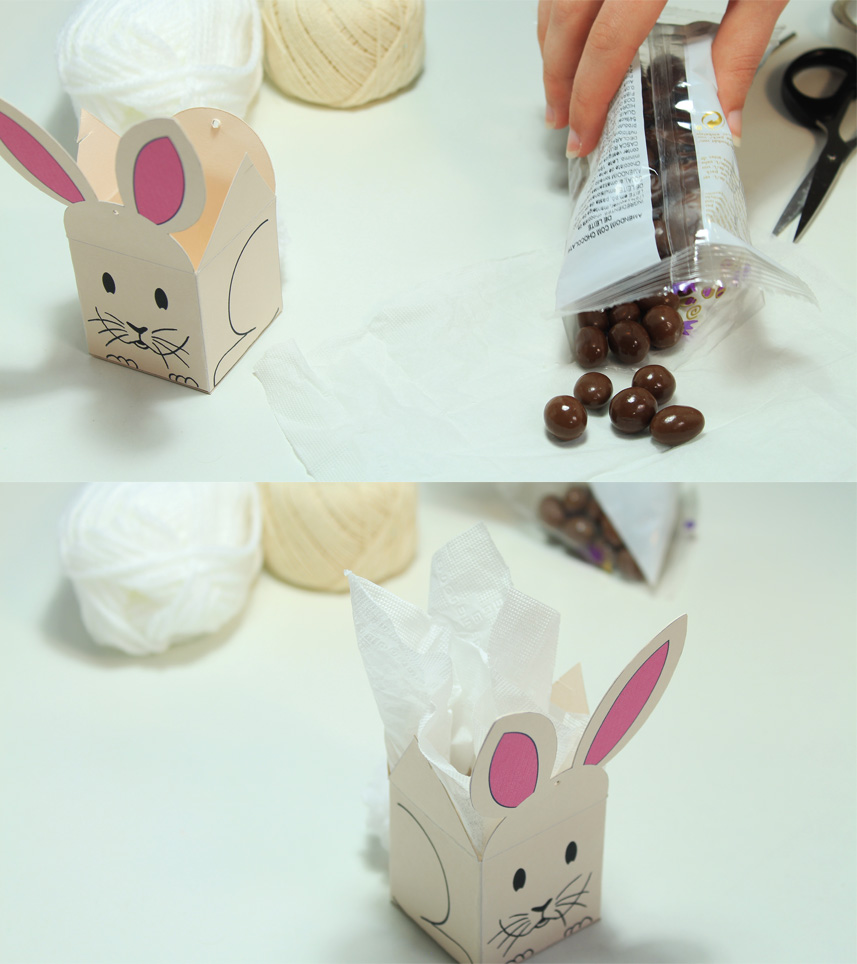
This DIY is for a box so you need to store something inside and also because is Easter there is nothing better as eggs. I used chocolate eggs because they are delicious and the smaller/cutter they had in store. Grab a square of tissue paper – any colour you like, maybe matching the box or the yarn – I went for simple white. Just lay your tissue paper on the table and add a few easter eggs, then grab the paper by the corners and place it inside the box.
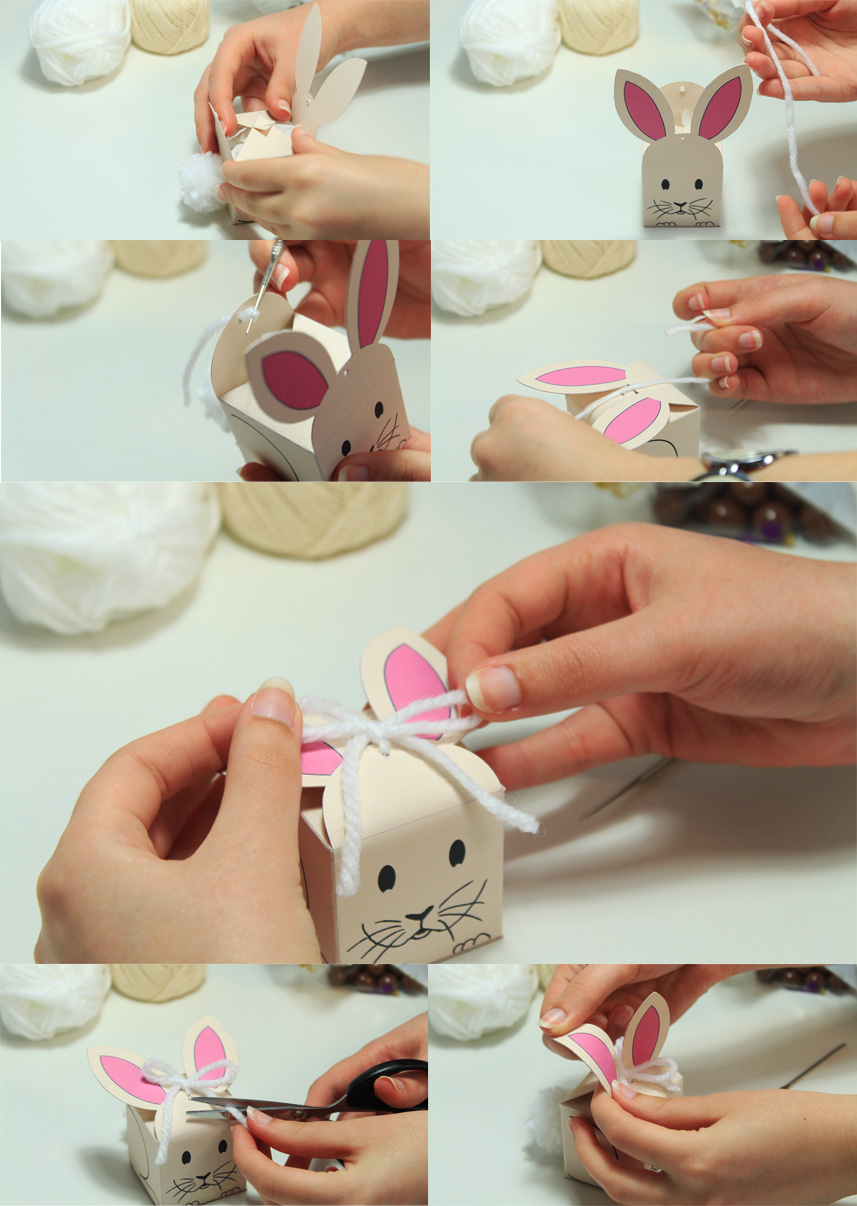
Fold the paper inside the box and close it using the slots. Grab another piece of yarn a pass it through the holes in the back and front faces of the box. Close it tightly with a nice bow and trim the excess yarn. Then just pull up the ears and curve the end just a bit for movement. And you are done!
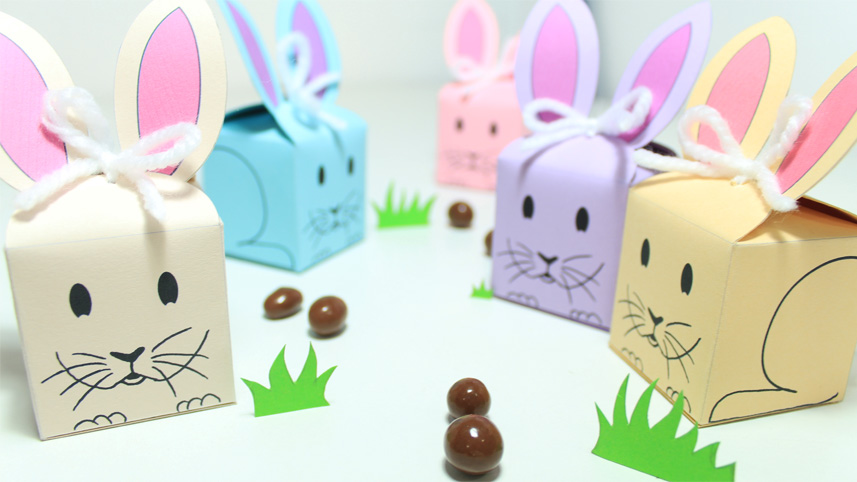
Hope you enjoyed this DIY and Happy Easter!!


No Comments