I had the craziest idea ever! It isn’t the first time I see a pom-pom rug over on Pinterest, and they are so fluffy that I just want one for myself. Until here there is nothing crazy about making one from scratch except if it is supposed to have 1,2m for 2m!! It’s HUGE!! I mean is the size that I want my rug but imagine how many pom-poms I have to make to be able to cover the whole thing! I still can’t believe how much time it will take me to create this.
So now I need to make pom-poms until my hands fell off – joking! But it’s a great opportunity to talk you through a few ways how you can make them. While DIYing the different methods some craft fails happened… And I’m going to share what went wrong for a change. Also, going to share what went right and a few more thoughts and tips for making pom-poms.
Before starting to go method by methods, there are three things you need to know that is valid for any pom-pom making way. First, always remember that the bigger the mold, the bigger the pom-pom will be and you will need more yarn. Second the larger the amount of yarn used for one pom-pom it will make it even more fluffy and steady not bigger in diameter just in fluffiness. Third, if you trim down your pom-pom, it will get to a point where when you squeeze it will be compact and also more round than ever.
Now I don’t talk you through every way possible to make pom-poms, you can search on Pinterest for more methods, but you can use from an embroidery hoop to two toilet paper rolls, just to give you an idea.
Using Cardboard Discs


- Cut down 2 discs of the same size.
- Cut part of the disc creating a C.
- Secure the beginning of the string between the two discs and start rolling around. Do as much yarn as you can/like.
- When over, secure the end and cut it. With your thumb and index fingers make pressure in the middle of the disc, so the strings don’t go anywhere.
- Start cutting the yarn between the two discs. When you’re over cut a piece of string big enough to wrap around and still have left over so you can use it to attach to anything you like.
- Wrap the string between the two discs and tie, wrap around again and tie it again as tight as you can and double knot.
- Take off the cardboard discs and trim it down to make it evener.
Thoughts
This one was the first method I ever used to create pom poms. Also after creating them with the different methods, this one had the most similar result to the pom-pom makers. Although, while I was trying to cut out the yarn I ended up damaging the cardboard. So I advise you to create a few at the same time to keep at hand.
Here you have the measures of the pom-pom makers (that I own and the only sizes I found in stores) so you can do the same size with the cardboard discs:
Smallest – diameter 3,5cm, interior diameter 1,5cm
Small – diameter 5,5cm, interior diameter 2,5
Medium– diameter 7cm, interior diameter 3cm
Big – diameter 9cm, interior diameter 4cm
Using your fingers


Warning: Don’t start rolling the yarn too thigh around your fingers there’s no need to cut the blood circulation.
- Hold the string with your fingers and cross it over.
- Roll as much yarn as you want around your fingers
- Hold the end with your thumb and cut the excess
- Cut an extra piece of string and pass it between your fingers and tie it around the yarn. Wrap around one more time and tie a double knot.
- Pull the pom-pom off your fingers and cut it.
- Trim it down.
Thoughts
Doing with your fingers is tricky. Help from another person should be great especially when you are tieing up the string around the yarn. Doing with only one hand and yet tight it well is a skill – I don’t have BTW.
One of the thing that sticks out the most compared with the other methods is the string around the yarn gets visible too clearly. Every time I did pom-poms with my fingers, I could always see where it was tight up, probably because I couldn’t tight it very well and doesn’t make the pom-pom open enough to hide the middle. Although it does create round shaped pom-poms, you just have to trim a few ends and voilá!
Using two fingers creates a pom-pom about the size of the smallest maker, but obviously, it changes from person to person. Also, you can use two, three or four fingers to create different size pom-poms.
Using a fork


- Press the beginning of the string with your thumb and cross over when you first wrap around.
- Wrap as much yarn as you want.
- Hold the end and cut it.
- Cut an extra string of yarn and pass through the center tine. Tight it with one knot and wrap around once again and tight a double knot.
- Remove from the fork and cut the yarn to open the pom-pom holding by the center.
- Trim down as you like.
Thoughts
This was my biggest fail! First off, make sure the yarn you are using can easily pass through the center tines or else the work is in vain. Second, my next difficulty was the amount of yarn I wrapped around. Even if I wanted to add more, I couldn’t since the fork is small and the yarn would start to get off the place and unroll.
You can use a meat fork for instance since it’s bigger or use a thinner string when doing pom poms with a fork.
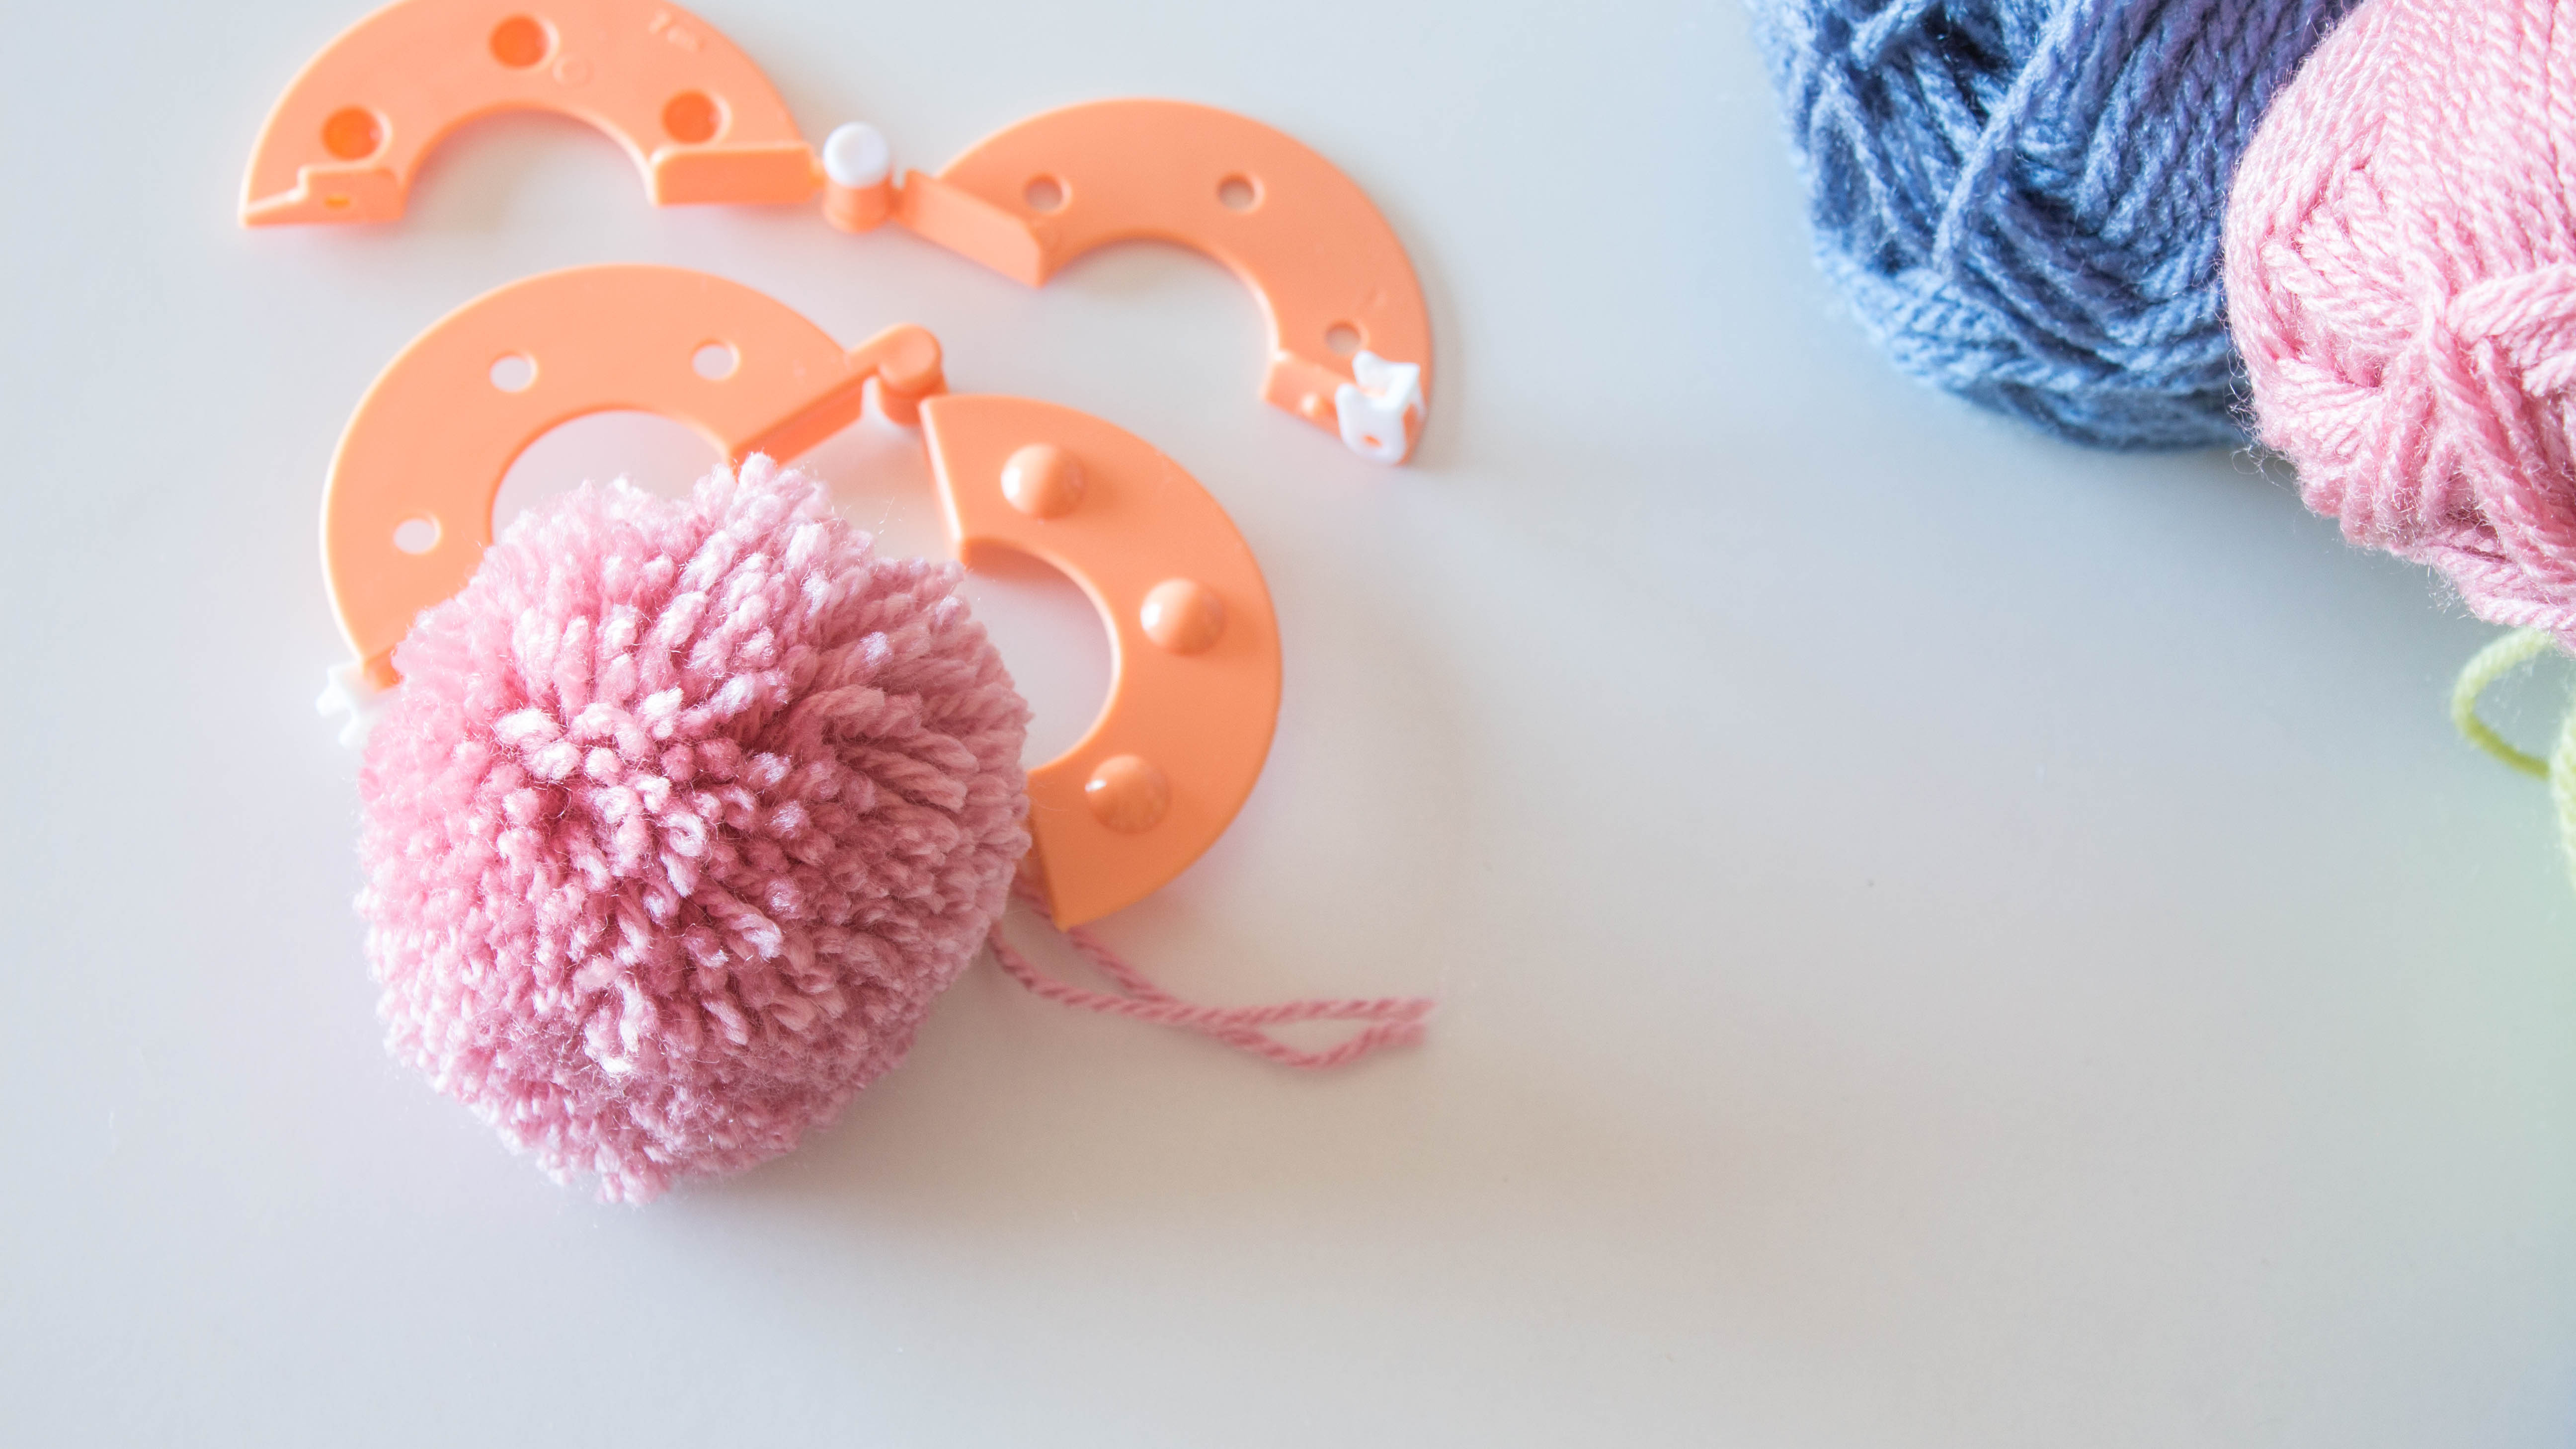
Using a maker


- Open the two halves of the maker
- Start wrapping around one of the sides.
- When one-half is full of yarn, you can cut the yarn and start over on the other half or – as I like to do – pass the string between the two molds and begging to wrap around the other half normally.
- When you have finished the other half, just cut the string and close the maker
- Hold with your thumb and index fingers the center of the maker and cut the yarn between the two discs.
- Cut a piece of string and wrap around the yarn. Tight once, wrap around again and secure with a double knot.
- Open the maker and separate it from the pom-pom. Trim it down to create a rounder shape.
Thoughts
No matter what you do, creating a pom-pom with a maker will always make it into an oval shape. I believe it happens because we create half of the pom-pom individually and join them together. Whatever the reason is if you want a perfect round pom-pom you’ll have to trim it down. Although this is the best, easiest and quick way to make pom-poms. Just put on a Youtube video and roll around over and over again. Very therapeutical.

So you can compare a few other pom-poms I made
- Pom-pom made with two fingers.
- Pom-pom made with the maker an not trimmed down.
- Pom-pom made with the maker and trimmed down.
- Pom-pom made with the maker and trimmed to a compact shape.